Your WordPress changes aren’t showing, and it’s frustrating. Most of the time, the problem isn’t your site, but it’s your cache.
Cached files can keep old versions of your pages, even after you update them. Until you clear that cache, visitors may never see your latest content.
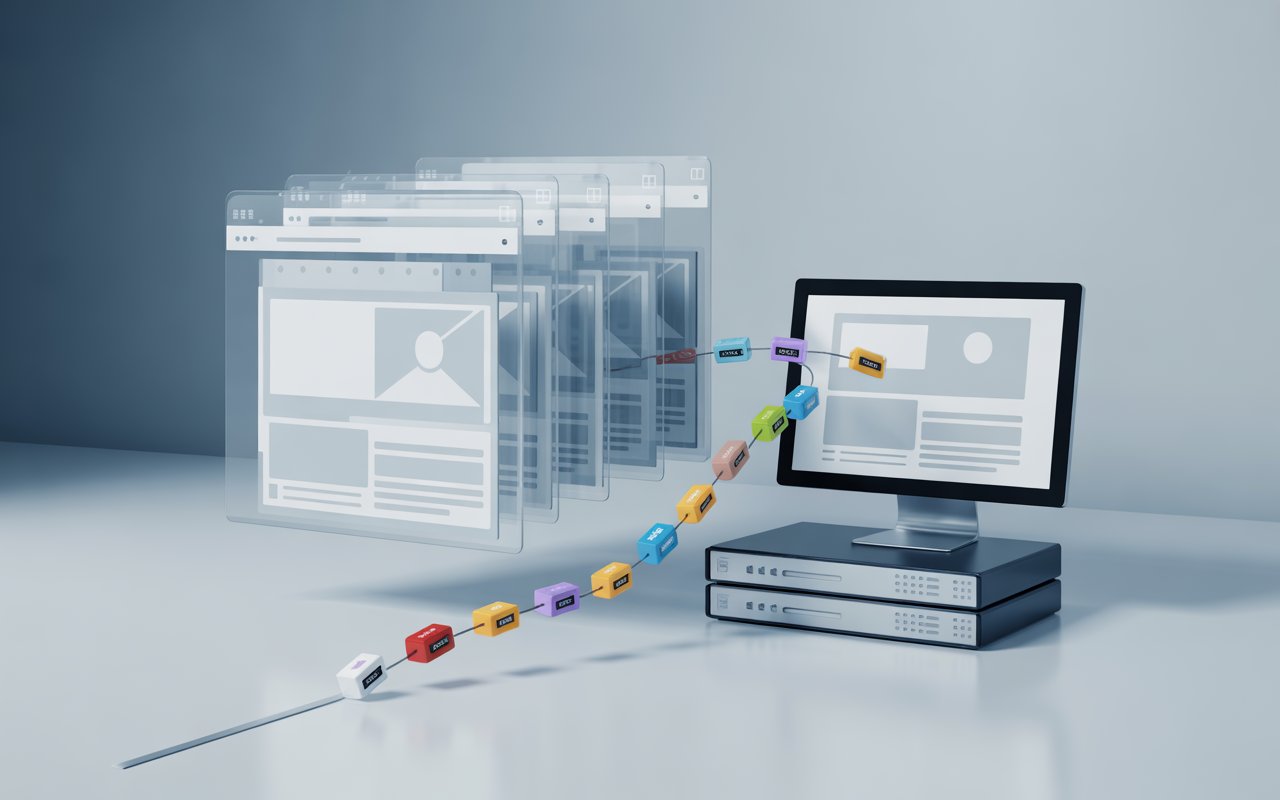
In this guide, you’ll learn exactly how to purge cache in WordPress step by step.
We’ll cover all methods (plugins, hosting, browser, and CDN), so you can fix the issue quickly and get your site updating properly again.
To learn how caching can improve your website performance, this guide on WordPress caching can take your website performance to the next level.
What Does “Purge Cache” Mean in WordPress?
“Purge cache” in WordPress means removing saved (cached) versions of your website so the latest content is shown instead of old files.
Caching stores copies of pages, images, and scripts to make your site load faster.
However, these saved files can become outdated after you make changes.
Purging the cache deletes those old copies and forces WordPress to load fresh content.
You may also see the terms clear, purge, and flush. They are often used in the same way, but there is a small difference.
“Clear cache” usually means removing specific cached files, such as one page. “Purge” or “flush” typically means deleting all cached data across the site.
In most plugins, “purge all cache” removes everything at once, while “clear cache” may target only part of the site.
After you purge the cache, your website rebuilds new cached files from scratch.
This ensures visitors see your latest updates right away. You might notice a short slowdown at first. This is normal.
Once new cache files are created, your site speed returns to normal.
Why You Need to Clear WordPress Cache
Changes Not Showing on Your Live Site
You update a page, but nothing changes on the front end.
This is the most common caching issue. Your site is still serving an older saved version instead of the updated one.
Clearing the cache forces WordPress to reload the newest version of your content.
Always start here if edits are not visible. If the issue continues, clear multiple layers, such as plugin, browser, and CDN cache.
Fixing Layout or CSS Issues
Design problems often come from cached CSS or JavaScript files.
You might fix spacing, colors, or fonts, but the old design still appears. This happens because browsers and caching plugins store static files for speed.
Clearing the cache removes those outdated files and loads the new styles.
This step is essential after changing themes, editing CSS, or updating page builders.
Performance Troubleshooting
Cache can sometimes cause unexpected performance issues.
For example, your site may load incorrectly, display broken elements, or behave inconsistently.
Clearing the cache helps you test the real, uncached version of your site.
This makes it easier to identify whether the problem is caused by caching or something else, such as a plugin conflict or server issue.
When NOT to Clear Cache (Important Insight)
Clearing cache is helpful, but doing it too often can hurt performance.
Cache exists to speed up your site by serving preloaded files. When you clear it, your server has to rebuild everything from scratch.
This can temporarily slow down your website, especially on high-traffic sites.
Avoid clearing cache unless necessary:
- Do not clear it after every small change
- Do not purge all layers without a clear reason
- Do not disable caching completely unless troubleshooting
Use cache clearing as a targeted fix, not a routine action.
Understanding the 5 Layers of WordPress Caching (Critical Framework)
1. Browser Cache
This is the first layer users interact with. Your visitor’s browser stores files like images, CSS, and JavaScript, so pages load faster on repeat visits.
The problem is that the browser may keep old versions of these files even after you update your site. That’s why users sometimes still see outdated content.
Clearing browser cache or doing a hard refresh forces the browser to request fresh files from your server.
This layer affects individual users, not your entire site.
Plugin (Page Cache)
Caching plugins create static versions of your pages and serve them instead of generating pages dynamically every time.
This reduces server load and improves speed. Popular plugins store these files and display them until the cache is cleared or expires.
If your changes are not showing, this is often the main cause.
Clearing the plugin cache deletes those stored pages and forces WordPress to generate updated versions.
Hosting/Server Cache
Many hosting providers add their own caching at the server level.
This can include full-page caching, object caching, or systems like Varnish. Even if you clear your plugin cache, the server may still serve an older version.
That’s why changes sometimes don’t appear even after clearing a plugin.
You need to purge the cache from your hosting dashboard to fully refresh your site at this level.
CDN Cache
A Content Delivery Network (CDN) stores copies of your site on servers around the world.
This helps your site load faster for global visitors.
However, it also means outdated content can be served from multiple locations.
If you update your site and users in other regions still see old content, the CDN cache is likely the cause.
Purging the CDN cache ensures all global servers serve the latest version of your site.
Object Cache (Redis/Memcached)
Object caching stores database query results instead of full pages.
This improves performance by reducing repeated database requests.
Tools like Redis or Memcached handle this layer.
While it does not usually affect visible content directly, it can still cause inconsistencies if outdated data is stored.
Clearing object cache refreshes stored queries and ensures your site uses the latest data.
Visual Hierarchy: How These Layers Work Together
Think of caching as stacked layers, where each layer can serve cached content before the next one is reached.
If you only clear one layer, another layer may still deliver outdated content.
Order from closest to user → deepest level:
- Browser cache (user device)
- CDN cache (global edge servers)
- Hosting/server cache
- Plugin/page cache
- Object cache (database level)
To fix most issues, clear the cache in this order:
- Start with the browser cache
- Then, clear the plugin cache
- Purge hosting/server cache
- Clear CDN cache if used
- Reset object cache only if needed
Understanding these layers helps you solve problems faster.
Instead of guessing, you clear the right cache at the right level.
Quick Checklist: Which Cache Should You Clear First?
When your site isn’t updating, don’t clear everything at once. Start with the most likely cache layer based on the problem.
This saves time and avoids unnecessary performance impact.
Use the quick decision guide below to choose the right starting point.
Step-by-Step Decision Guide
- If only you see the issue (frontend problem):
Start with your browser cache.- Do a hard refresh (Ctrl + Shift + R or Cmd + Shift + R)
- Clear browser cache if needed
This fixes most “I can’t see my changes” problems.
- If the issue appears across your entire site:
Clear your plugin cache first. Then check your hosting/server cache.- Click “Clear/Purge Cache” in your caching plugin
- Use your hosting dashboard to purge server cache
This solves most site-wide update issues.
- If users in different locations see old content:
Clear your CDN cache.- Go to your CDN dashboard (e.g., Cloudflare)
- Click “Purge Everything” or clear specific URLs
This ensures global visitors get the latest version.
Simple Flow (Beginner-Friendly)
Follow this order until the issue is fixed:
- Start with browser cache → Quick and local fix
- Then clear plugin cache → Most common cause
- Then clear hosting/server cache → Overrides plugin cache
- Then purge CDN cache → Fix global delivery issues
Pro Tip
Always test your site after each step. Stop once the issue is resolved.
Clearing all layers at once is not necessary and can slow your site temporarily.
Method 1 – How to Purge Cache Using WordPress Plugins
Overview: The Easiest Method
Using a caching plugin is the fastest and most beginner-friendly way to purge cache in WordPress.
Most plugins store static versions of your pages and give you a simple button to clear them.
You don’t need technical skills or server access.
In most cases, clearing the cache from your plugin fixes the issue immediately.
You can usually find the option in your WordPress dashboard or admin toolbar at the top of the screen.
Clear Cache in WP Rocket
WP Rocket makes cache clearing very simple. You can do it in one click.
- Go to your WordPress dashboard
- Navigate to Settings → WP Rocket
- Click the “Clear Cache” button
You can also use the admin toolbar at the top of your site and select “Clear and preload cache”.
This not only clears old files but also rebuilds the cache automatically for better performance.
Clear Cache in W3 Total Cache
W3 Total Cache uses a slightly different label, but the process is just as easy.
- Go to your WordPress dashboard
- Navigate to Performance
- Click “Empty All Caches”
You can also access this option from the admin toolbar.
This clears all cached files across the plugin, including page cache and database cache.
Clear Cache in LiteSpeed Cache
LiteSpeed Cache provides a quick option directly in the toolbar.
- Go to your WordPress dashboard
- Hover over LiteSpeed Cache in the top admin bar
- Click “Purge All”
This instantly removes all cached pages and forces your site to generate fresh content.
General Rule for Any Caching Plugin
Most caching plugins follow the same pattern, even if the interface looks different.
If you’re using a different plugin, look for one of these options:
- “Clear Cache”
- “Purge Cache”
- “Delete Cache”
- “Flush Cache”
These buttons are usually found in:
- The WordPress admin toolbar (top of the screen)
- The plugin’s settings page
If you’re unsure, start by checking the toolbar. It’s often the quickest way to clear the cache.
Method 2 – Clear Cache from Your WordPress Hosting
Why Hosting Cache Overrides Plugin Cache
Your hosting provider may run its own caching system at the server level.
This sits deeper than your plugin cache and can serve cached pages before WordPress or your plugin is even reached.
That’s why clearing your plugin cache sometimes doesn’t fix the issue. The server may still deliver an older version of your site.
To fully refresh your website, you often need to clear both plugin and hosting cache.
If changes still don’t appear after using a plugin, this is the next place to check.
cPanel / hPanel Cache Clearing
Many shared hosting providers offer cache controls inside cPanel or hPanel.
These tools manage server-level caching without needing technical setup.
- Log in to your hosting dashboard (cPanel or hPanel)
- Look for sections like:
- Cache Manager
- LiteSpeed Cache
- Performance or Optimization
- Click options such as:
- “Purge Cache”
- “Flush Cache”
- “Clear All Cache”
Some hosts also provide automatic caching systems like LiteSpeed.
In those cases, clearing the cache from the panel ensures the server stops serving outdated files.
Managed Hosting (WP Engine, SiteGround, etc.)
Managed WordPress hosts include built-in caching designed for performance.
These platforms usually provide a one-click option to clear the cache.
- Log in to your hosting account
- Open your site dashboard
- Find the caching or performance section
- Click “Clear Cache” or “Purge All Cache”
Some hosts also add a shortcut inside your WordPress admin bar for quick access.
This makes it easy to clear the server cache without leaving your site.
If your site still shows old content after clearing the plugin cache, always clear the hosting cache next. This step resolves many stubborn caching issues.
Method 3 – Clear Browser Cache (Often Overlooked)
Why Users Still See Old Content
Your browser saves parts of websites, like images, CSS, and scripts, to load pages faster on repeat visits.
This is called browser cache. The problem is that your browser may keep showing these saved files even after you update your site.
That’s why you might see outdated content while others see the new version.
This issue is local to your device, which means clearing your WordPress cache alone will not fix it.
You must refresh or clear your browser cache to force it to load the latest files from the server.
Step-by-Step: Clear Cache in Chrome
Follow these steps to clear the browser cache in Google Chrome:
- Open Chrome
- Click the three dots (top right corner)
- Go to Settings
- Click Privacy and security
- Select Clear browsing data
- Choose Cached images and files
- Click Clear data
This removes stored files and ensures your browser loads fresh content the next time you visit your site.
Hard Refresh Shortcut (Quick Fix)
If you don’t want to clear all cached data, use a hard refresh.
This forces the browser to reload the page without using stored files.
- Windows: Ctrl + Shift + R
- Mac: Cmd + Shift + R
This is the fastest way to check if caching is the issue.
Always try a hard refresh first before clearing the full browser cache.
Method 4 – Purge CDN Cache (Cloudflare & Others)
Why CDN Cache Causes Global Issues
A CDN (Content Delivery Network) stores copies of your website on servers around the world.
This helps your site load faster for visitors in different locations.
However, it also means outdated content can be stored in multiple places at once.
Even if you clear your WordPress or hosting cache, the CDN may still serve old versions of your pages.
This is why some users see updates while others do not.
If your site looks correct in one location but not another, the CDN cache is usually the cause.
Purge Everything vs Specific URLs
Most CDN providers, including Cloudflare, give you two main options when clearing cache:
- Purge Everything
- Clears all cached files across all locations
- Forces the CDN to fetch fresh content from your server
- Best for major updates or site-wide changes
- Purge Specific URLs
- Clears cache for selected pages only
- Keeps the rest of your cache intact for performance
- Best for updating a single page, post, or asset
Choosing the right option helps you fix issues without slowing down your entire site.
When to Use Each Option
Use “Purge Everything” when:
- You redesigned your site
- You updated themes or core files
- Multiple pages are not updating
Use “Purge Specific URLs” when:
- Only one page is showing old content
- You updated a single blog post or image
- You want to avoid a full cache reset
How to Purge CDN Cache (General Steps)
While interfaces vary slightly, the process is usually the same:
- Log in to your CDN dashboard
- Select your website
- Go to the Caching section
- Click “Purge Cache”
- Choose “Purge Everything” or target specific URLs
After purging, give it a few moments to refresh across all locations.
Then reload your site to confirm the changes are visible everywhere.
Method 5 – Clear Cache Manually via FTP (Advanced)
Access /wp-content/cache/
Manual cache clearing gives you direct control when plugins or hosting tools fail.
You’ll need an FTP client (like FileZilla) or your hosting file manager.
Connect to your server using your FTP credentials.
Once connected, open your WordPress root directory (often called public_html).
From there, navigate to /wp-content/ → cache/. This folder stores cached files created by plugins or server-level systems.
If you use a caching plugin, you may also see subfolders named after it.
Delete Cached Files Safely
Do not delete everything blindly. Focus only on cache files and folders.
- Open the
cachefolder - Select all files and subfolders inside it
- Delete them (not the folder itself)
This removes stored cache without affecting your website’s core files.
WordPress and your caching system will automatically regenerate new cache files when visitors load your site again.
Avoid deleting other folders like themes, plugins, or uploads, as this can break your site.
When Manual Clearing Is Required
Use this method only when normal options do not work. It is not needed for everyday use.
Manual clearing is useful when:
- Your caching plugin is not responding
- Hosting cache tools are missing or failing
- You still see old content after clearing all other cache layers
- You need full control over cached files
After deleting the cache, reload your website and test changes.
If the issue is resolved, the problem was likely stuck cache files.
Method 6 – Clear Object Cache (Redis / Memcached)
What Object Cache Stores
Object cache stores the results of database queries instead of full pages.
This includes things like post data, settings, menus, and user-related information.
Tools like Redis and Memcached keep this data in memory, so WordPress does not need to query the database repeatedly.
This improves speed, especially on dynamic sites.
Unlike page cache, object cache does not control what users see directly, but it can still affect how quickly updated data appears.
When to Purge Object Cache
You do not need to clear the object cache often. Only do it when there is a clear issue.
Purge object cache when:
- Changes are saved but not reflected correctly
- Dynamic content (menus, widgets, user data) is outdated
- You recently updated plugins, themes, or database settings
- You are troubleshooting performance or data inconsistencies
Avoid clearing it frequently. Object cache improves performance, and unnecessary purging removes that benefit.
How to Clear Object Cache (Hosting or Plugin Methods)
Most setups that use Redis or Memcached provide simple ways to clear the cache.
Option 1: Hosting Dashboard
- Log in to your hosting account
- Find sections like:
- Redis Manager
- Cache Manager
- Click “Flush Cache” or “Restart Service”
Option 2: WordPress Plugin
If your host uses Redis, you may have a plugin installed.
- Go to Settings → Redis
- Click “Flush Cache”
Some caching plugins also include object cache controls in their settings.
Key Tip
Object cache is deeper than page cache.
If your site looks correct but behaves incorrectly (wrong data, outdated menus, or inconsistent results), this is the layer to check.
Clear it only when needed, and always test your site after making changes.
How to Verify Cache Has Been Successfully Cleared
Use Incognito Mode
Start by opening your site in an incognito (private) window.
This loads the page without using your existing browser cache or cookies.
It is the quickest way to see a fresh version of your site.
If your changes appear correctly in incognito but not in a normal tab, the issue is likely your browser cache.
This confirms that your site is updated, and only the local cache needs clearing.
Check Version Changes
Look for clear signs that your update is live. Focus on the exact change you made.
- Updated text or images
- New layout or design changes
- Fixed spacing or styling issues
Reload the page and confirm the update appears consistently.
If possible, check the page on another device or network.
This helps confirm the change is visible beyond your local environment.
Use DevTools (Disable Cache)
Modern browsers allow you to temporarily disable cache using developer tools.
This forces the browser to load all files directly from the server.
- Right-click on your page and click Inspect
- Go to the Network tab
- Check “Disable cache”
- Reload the page
This method is more precise than a normal refresh.
It helps confirm whether cached files are still being used.
Compare Logged-In vs Logged-Out Views
WordPress often bypasses the cache for logged-in users.
This means you might see updated content while visitors still see old content.
- View your site while logged in
- Then log out or open incognito mode
- Compare both versions
If the logged-in view is correct but the logged-out view is outdated, caching is still active somewhere (plugin, server, or CDN).
Clear the remaining cache layers and test again.
Common Problems After Clearing Cache (And Fixes)
Site Slower Temporarily
After you clear the cache, your site may feel slower at first. This is normal.
Cached files have been removed, so the server must rebuild pages and assets from scratch.
Speed improves again once the new cache is generated.
What to do:
- Visit key pages to help rebuild the cache quickly
- Use your plugin’s preload or warm cache feature if available
- Avoid clearing the cache repeatedly within a short time
Cache Not Clearing Properly
Sometimes you click “clear cache,” but the issue remains.
This usually means another cache layer is still active.
One layer may be cleared while another still serves old content.
What to do:
- Clear cache in this order:
- Browser
- Plugin
- Hosting/server
- CDN
- Use incognito mode to test changes
- Disable caching temporarily to confirm the issue
Conflicts Between Cache Layers
Using multiple caching systems can cause conflicts.
For example, a plugin cache and server cache may store different versions of the same page.
This leads to inconsistent results or broken layouts.
What to do:
- Use only one main page caching system
- Avoid overlapping features (e.g., two page cache tools at once)
- Check plugin settings for duplicate caching options
- Restart or flush all layers once after fixing the settings
CDN Still Serving Old Content
Even after clearing local and server cache, your CDN may still deliver outdated files from edge servers.
This often causes users in different regions to see old content.
What to do:
- Log in to your CDN (e.g., Cloudflare)
- Click “Purge Everything”
- Wait a few minutes for global updates
- Reload your site and test from different locations
Best Practices for Managing WordPress Cache
- Don’t clear the cache too often
Clearing the cache removes stored files that make your site fast. If you do it too frequently, your server has to rebuild everything each time, which can slow down performance. Only clear the cache when you make visible changes or when something is not updating correctly. - Use automatic cache purging
Most caching plugins allow you to automatically clear the cache when you update a page, post, or setting. This ensures visitors always see fresh content without manual work. Enable features like auto-purge or cache invalidation in your plugin settings. - Combine with CDN and object cache
For better performance, use multiple layers of caching correctly. A CDN speeds up global delivery, while object cache (like Redis or Memcached) improves database performance. Together, they reduce load time and server strain. - Set proper cache expiration rules
Cache should not last forever. Set expiration times so files refresh automatically after a certain period. For example:- Static files (images, CSS): longer duration
- Dynamic content: shorter duration
This keeps your site fast while ensuring content stays up to date.
Tools & Plugins to Manage Cache Efficiently
Choosing the right caching plugin can make a major difference in your site speed and stability.
The three most widely used options are WP Rocket, LiteSpeed Cache, and W3 Total Cache.
Each serves a different type of user, depending on ease of use, hosting setup, and level of control required.
WP Rocket (Best for Simplicity & Performance)
WP Rocket is a premium caching plugin designed for ease of use and fast results.
It automatically applies key performance optimizations without requiring complex setup.
- Beginner-friendly with minimal configuration
- Includes page caching, cache preloading, and file optimization
- Supports lazy loading and database cleanup
- Works on most hosting environments
WP Rocket is ideal if you want a “set it and forget it” solution.
It handles most optimization tasks automatically, which saves time and reduces errors.
LiteSpeed Cache (Best for LiteSpeed Hosting)
LiteSpeed Cache is a powerful free plugin that works best on LiteSpeed servers.
It combines plugin-level control with server-level caching for better performance.
- Free and feature-rich
- Includes page cache, object cache, and browser cache
- Built-in CDN integration (QUIC.cloud)
- Advanced optimization features like image compression
This plugin is the best choice if your hosting uses LiteSpeed.
It delivers strong performance because caching is handled directly at the server level.
W3 Total Cache (Best for Advanced Control)
W3 Total Cache is one of the most feature-rich free caching plugins available.
It gives you full control over multiple caching layers.
- Supports page, database, object, and browser caching
- Integrates with CDNs for faster delivery
- Highly customizable for advanced users
- Improves performance and Core Web Vitals
This plugin is powerful but more complex.
It is best suited for developers or users who want deep control over caching behavior.
What to Look for in a Caching Plugin
When choosing a caching plugin, focus on features that match your needs and skill level:
- Ease of use:
Choose simple plugins like WP Rocket if you are a beginner - Compatibility with hosting:
LiteSpeed Cache works best on LiteSpeed servers - Caching layers supported:
Look for page, browser, and object caching options - Automation features:
Auto cache clearing and preloading save time - Performance optimization tools:
Minification, lazy loading, and CDN support improve speed - Support and updates:
Reliable plugins are actively maintained and documented
Final Thoughts
Caching works in layers, and each layer can affect what your visitors see.
If something isn’t updating, the fix is simple: clear the right cache, not all of them at once.
Start small. Check your browser, then your plugin, then your hosting, and finally your CDN if needed.
Test after each step so you know what solved the issue.
Follow this method every time, and you’ll fix cache problems quickly without slowing down your site.
Still want to know more about how to use caching to improve your website speed? This WordPress caching guide is worth reading.
FAQs
Click “Clear Cache” or “Purge Cache” in your caching plugin, hosting dashboard, or CDN. Start with the plugin, then clear other layers if needed.
Your site is likely serving cached content. Changes may be stuck in one or more layers, like browser, plugin, server, or CDN cache.
WordPress has basic caching, but it is not persistent. Advanced caching requires plugins or hosting-level solutions.
Only when needed, such as after updates or when changes are not showing. Avoid clearing it regularly.
Old cached files are deleted, and your site loads fresh content. You may notice a brief slowdown while the new cache is rebuilt.
Not always. Start with the most likely layer and only clear others if the issue is not resolved.

Hi, I’m Daniel Cacheton. I specialize in WordPress performance optimization and have spent 7+ years improving site speed, Core Web Vitals, and overall user experience. I share practical, no-fluff guides based on real testing to help you build faster WordPress websites.